SSIS, Create a Dynamic Excel file with dynamic Sheet Names
Create a Dynamic Excel File with Dynamic Sheet Names in SSIS. I found this one of the easiest ways to dynamically create an excel file with dynamic sheet names.
Step 1
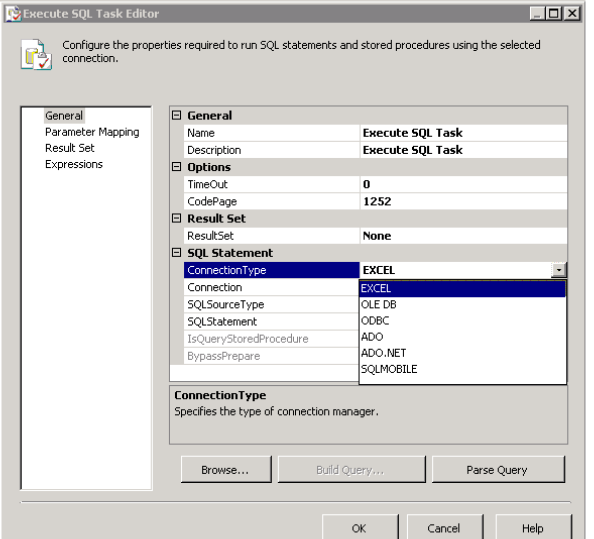
Select SQL Task Editor and then in General -> Connection Type -> Select Excel
Step 3
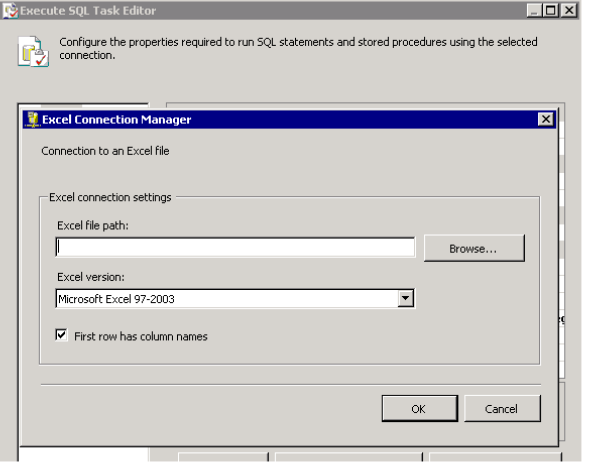
And then just below Connection Type in the “Connection” tab select “New Connection” and you will get the image to the right.
Step 3
Create a blank excel file or a dummy File to select the file for the above screen.
Need not worry about headers etc.
Step 4
Select SQL Source Type as “Direct Input”
Step 5
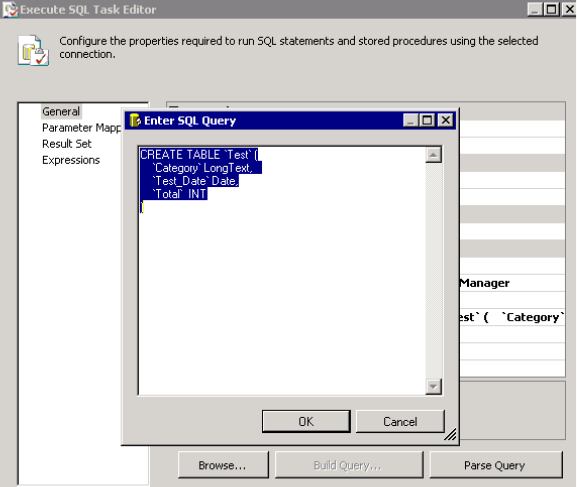
This is the Key part.
In the SQL Statement tab, write the code just the way we do for creating a table in SQL.
One can create the columns depending on the nature of column types like Varchar, INT, DECIMAL etc.
Here, in the above figure, “” refers to the Sheet name and the rest refers to the columns within the sheet.
Then Click “OK”.
If you want to have multiple sheets, then follow the above steps with multiple SQL Task Editors.
Now, all set for dynamic sheet names
If you want to have multiple sheets, then follow the above steps with multiple SQL Task Editors.
Now, all set for dynamic sheet names
Step 6
Now if you want to create the excel files dynamically
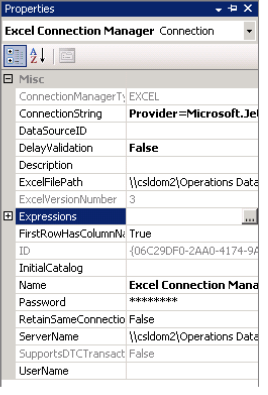
Select the Excel Connection Manager that is created in the Connection Managers pane and then go to Properties
Step 7
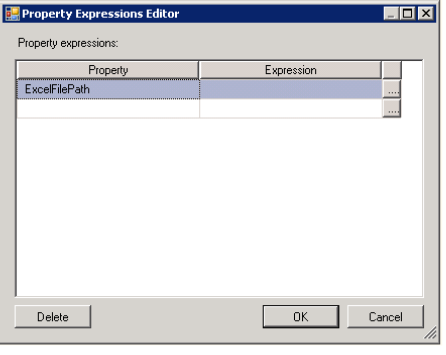
Click on the navigation pane of Expressions tab and you will be directed to Property Expression Editor Window.
Select “Excel File Path” from the drop down list of the Property tab in the Property Expression Window and click on “Expression” navigation pane.
Step 8
Now you will be directed to Expression builder window where you can build up your expression for the file path and file name for the excel sheet like below.
Check the expression by using “Evaluate Expression” in the bottom and when you are happy click “OK”.
That’s all you are done.
Now when you execute the package, you will see the desired sheet names with desired File name in the desired file path.
Step 9
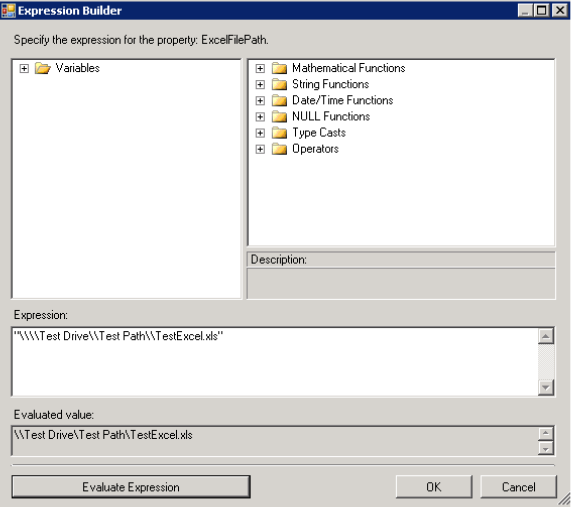
Now you will be directed to Expression builder window where you can build up your expression for the file path and file name for the excel sheet like below.
Check the expression by using “Evaluate Expression” in the bottom and when you are happy click “OK”.
That’s all you are done.
Now when you execute the package, you will see the desired sheet names with desired File name in the desired file path.